Showing posts with label Tips and Tricks. Show all posts

Tuesday, November 20, 2012

Tips & Tricks: Unique Use of a Red Lipstick

We all have struggled to find our perfect Red Lipstick isn't it? If you have found it, then congratulations but if you haven't then fear not, you will find it one day :) Nowin this quest of finding our perfect Reds we have by now for sure collected a few many Red lipsticks that seem to be of no use to us now right?
So what do we do with them?

Yup, for one we could use them as a blush can't we... That's a no-brainer right? How about I tell you another use of a discarded Red lippy?

Truth be told, the trick that I am gonna share with you guys is not something that I thought of. It was discovered/invented by my little cousin sister and the effect that it has on one's look is just fabulous! Ladies and gentlemen, please welcome Vijeta, my baby cousin who actually came up with and demonstrated to me this awesome technique...

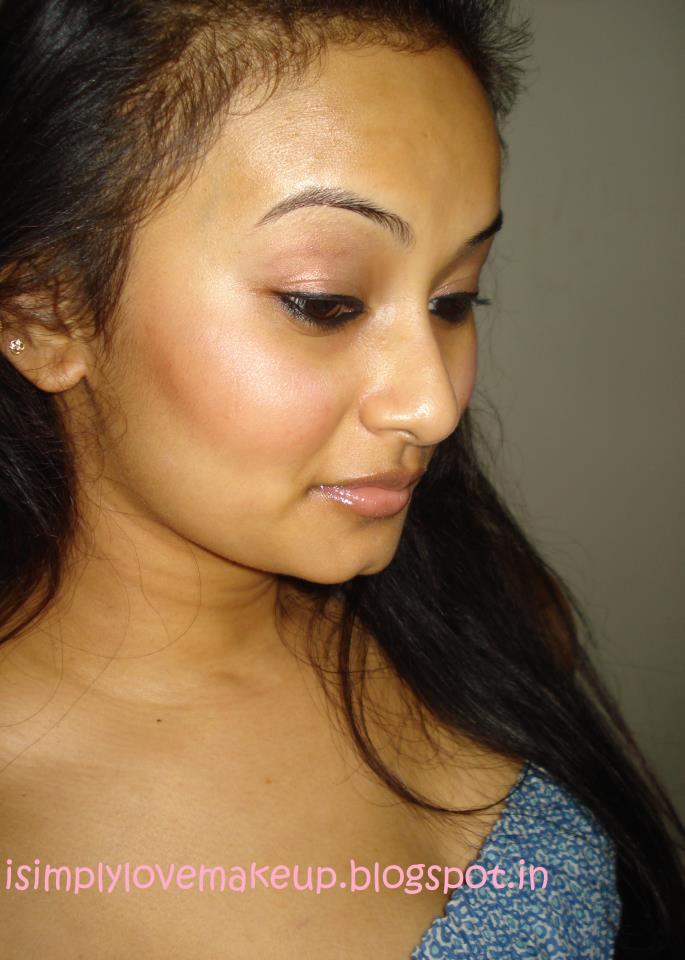
What she does is, she dots the bridge of her nose and her inner-cheek with her red lippy and blends it all outwards. This gives her a natural looking perpetual blush that seems to be coming from within :)

Take a look...


I tried it and it looks superb on me too :) Here's a pic...
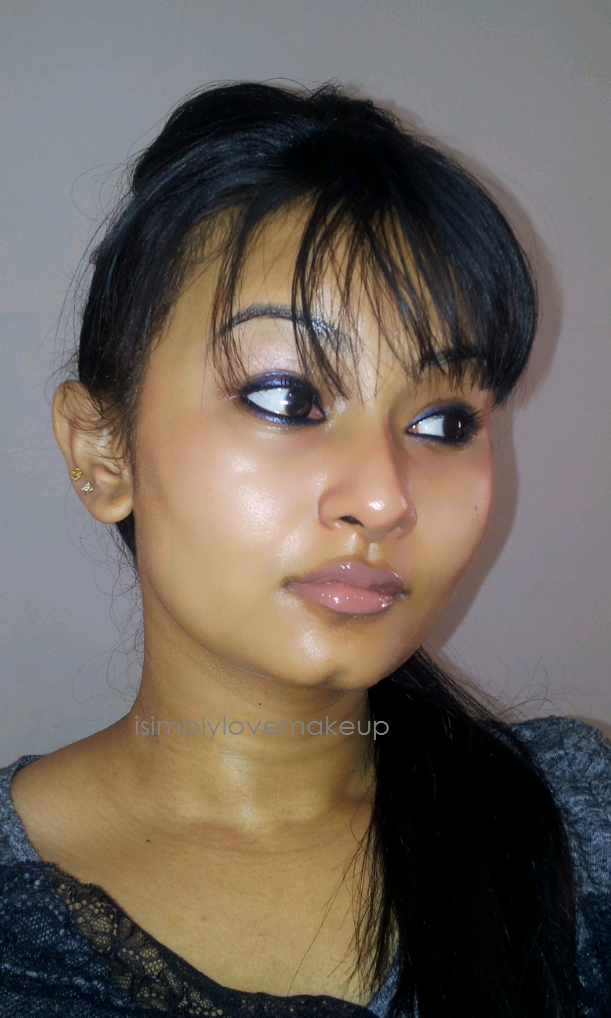
Forgive the oily face :P


Analysis
This look would be apt when you really want to look like you have no makeup on and show a bit of red-ness. It gives an illusion of innocence, delicate skin and a very fair complexion.
But do be wary that this trick would work only on fair and medium skintones. On dark skins it might just look like a rash... One has to understand that this trick is to create an illusion of fair and delicate skin.


Did you check out my new outfit post on isimplylovetodressup.blogspot.com where I bid adieu to the Summers of 2012.

Friday, September 28, 2012

Which Is The Right Foundation For You? (Part-1)

This is like I think the most asked question and the most difficult question to answer... Let's have a show of hands about how many of you are with me here :P

When I started out with make-up, I was shit scared of wearing foundation cause I did not want to look like a ghost and kept looking for answers to this questions on various blogs and forums. Today, when I am a seasoned beauty blogger, I still dread my readers asking this question to me. Why? The reason simply being that we have very very different skin textures, skin tones, body heat, pH balance and well expectations from a little wonder that we call a foundation. Yes all of these factors contribute to finding the perfect foundation for yourself and it is no easy task to "recommend" a single product to anyone.

Image Source

So I thought I'll go ahead and list out the factors that one needs to keep in mind when going for a foundation. Also, do note that this post is a 2 part post and the 2nr part of the post will be coming along pretty shortly as well, where I will be listing out some of my really favorite foundations...

Foundation according to one's skin type
I cannot even begin to tell you all how important it is choose a foundation that is according to your skin type. Yes it is the most important factor and the most significant attribute in making or breaking your look. 

It's terrible to see a matte finish on a dry-skinned beauty because with time, dry skin tends to become drier and by the end of the night you will left feeling really uncomfortable due to your stretchy skin that will also end up itching a lot. Trust me, I have really dry skin and I have been through this particular trauma.

On the other hand, oily skinned ladies will face the issue of their skin becoming more and more oily as the evening wears on and having a matte skin when you started the evening would really help! 

Foundation according to one's skin tone
With our lives being under microscopic scrutiny through social networking sites like Facebook, Twitter and the like, every moment of our lives especially celebrations are recorded in pictures and images for everyone to see and "judge". It is of therefore of utmost importance to have everything right and that starts with the right foundation!

I cringe when I see a beautiful face made "unpretty" because of the use of a wrong foundation. The biggest mistakes we tend to make when using a foundation is getting the undertone all wrong... Just because you and I both are on the fairer side doesn't mean that you and I will suit the same foundation. It is extremely important that you know your undertone. I have a yellow undertone and I make it a point to pick up a yellow-based foundation only even if the SA is telling me the other way round.

If you want your foundation to blend seamlessly into your complexion, you must match it to your undertone.

Different Foundations for different seasons
Yes I have different foundations for different seasons and it is one of the major factors that contributes to you looking flawless 365 days a year. I tend to use a lighter coverage foundation during the summers and a "heavier" foundation during the winters. I avoid foundations during the monsoons cause I have a phobia of clogged pores during the humid weather.

Different Foundations for different weathers
My parents stay in Mumbai, which is humid to the core and I stay in Pune, which is like one of the driest places I lived in. The dryness in Pune and the humidity of Mumbai just 200 kms afar never ceases to amaze me. But keeping geography aside, the point to note here is that have different foundations for different cities is the key to not being caught like a deer in the headlights...

I love using my Maxfactor Second Skin liquid foundation in Pune and Colorbar's stick foundation/TBS Extra Virgin Minerals Cream Compact Foundation in Mumbai. 

Which one should I go for? Liquid, Cream/Powder Compact or Stick?
This again is something that you'll be able to answer yourself with a few experiences in your pocket! I generally prefer a liquid foundation when I know the evening is going to be long, maybe stressful and well when I will be alternating between AC and non-AC.

When I was getting married, I had used my Maxfactor Second Skin Liquid Foundation on myself. It stayed put all night like how a good foundation is supposed to but the amazing thing was that it did not oxidize! With stress, our body starts releasing a lot of hormones and pheromones and not to forget heat that tends to oxidize the foundation and make it go darker. I have seen out of my own experience that liquid foundations tend to fight oxidizing more effectively than the cream compact ones.

Once the foundation is done, I am ready to go right?
Wrong! Once you have found your perfect foundation and it blends into you, it is really important to "sculpt" your face. A foundation especially heavy coverage ones tend to make your face look flat as they hide every indent, every curve on your face. Thus you need to highlight and lowlight your face to give it dimension. If you are not confident using a bronzer or a contour shade, just a dab of blush at the right location can do wonders!

Some cardinal rules that I follow:
1. I always use a primer under my foundation.

2. I always moisturise my face before applying the primer

3. If I feel the foundation not gliding smoothly on my face then I run far away from it. For dry skin beauties, your foundation should easily glide on your skin. For oily skinned beauties make sure that your foundation does not glide too easily on your skin :P

4. I mostly use a light coverage foundation and so always keep my face bleached... Fine hair visible under the foundation is as gross as it can get.

5. I always buy a yellow-based foundation as it suits with my undertone. 85% of us Indians have a yellow undertone. 

Do not listen to anyone... Do your research and do not be afraid to try out a couple of foundations before you settle onto the one that suits you best :)

Thursday, June 14, 2012

READER QUERY: Tips For Natural Looking Makeup

Hi Samyukta,

Thankyou for your response !
I am a make-up fan, however, don’t like patchy/loud makeup..After seeing your nude make-up, I’ve fallen in love with it and would be keen to learn the techniques…Also, would like an advice on whether it will suit me & what best colours could go with my complexion...I would appreciate if I could be one of the selective few to understand this style from you J

Regards
Reshma Suri

Thank you Reshma for your kind words :) I am so glad you liked my nude/natural makeup look and would like to try it out for yourself too :) I feel honored...

Here are a few looks of mine in neutral/nude makeup...


If you observe all these looks closely, you'll notice a pattern... Glowing skin, defined lips and healthy glossy lips. So we're gonna see how we can achieve that today...

Now before I start with various techniques and pointers to achieve a flawless natural lool here is a list of tools and products that we shall be needing:
1. A blending brush 
    I recommend either Faces 106 or MAC 227 brush

2. A neutral eye shadow or an eye shadow palette
    I recommend either Maybelline Diamond Shine eye shadow quad in Copper 
    Brown or MUFE Star Powder in Shade 940 or actually any neutral shade that 
    you have would do :)

3. A nice highlighter and bronzer
    I love using the Lakme Absolute Moonlit Highlighter Duo.

4. A Nude Lipstick (Matte preferable)
    This should be any lipstick that looks nude on you. I recommend either 
    Colorbar Velvet Matte Lipstick in Bare or any of the nude MAC lippies... I 
    personally prefer MAC Taupe :)

5. A Clear Lipgloss
    I love using Body Shop's Lip Treatment Gloss in Beige Sparkle. You could use 
    any of your favorite clear glosses :)

6. A light to medium coverage foundation which gives a dewy finish 
    rather than a matte look.
    I have dry skin and I swear by these three foundations: Maxfactor's Second 
    Skin Foundation, TBS Extra Virgin Minerals Cream Compact Foundation and   
    MAC Mineralize Compact Foundation with SPF15. 

7. A Concealer
    If you don't have a dark circles problem you can easily get away with 
    Colorbar's Stick Concealer. I use it and love it! If your dark circles' problme is 
    more persistent I would suggest MAC Select CoverUp concealer. 

Now for the basics... When doing a nude/natural makeup there are the basic steps,
1. Since we shall be using only nude/neutral colors, it is important to give your maximum efforts to your skin. We need the skin to look flawless and polished. Avoid going for a matte look as it tends to look severe. Rather aim at making your look glowy and dewy :) It automatically takes years of your face and makes one look fresh and attractive.

2.  Try to use a light coverage foundation if you already have good skin... Go for medium coverage if there are a few areas that you want to cover up. DO NOT use a heavy coverage foundation. It ends up looking all "made up" and hence defeats the purpose of a natural looking makeup :)

3. Use concealer on the under-eye region. Yes using a concealer is a must. You can skip other regions, but under eye concealing should not be skipped. It can make or break your whole look in a second!

4. Use the concealer under your foundation!

5. If you wish you could finish off the base makeup with a finishing powder especially if you are worried about oiliness. I generally do not use a finishing powder cause not using one works for me better than using one :)
If you are using a finishing powder be sure to use one without any glitter or reflecting particles!

6. Once you are done with your base, apply your eye primer and then your neutral eye shadow on your lid with a flat eye shadow brush in a "pat-pat" motion. Do not rub or swipe the shadow but "pat" it to apply for better pigmentation.

7. Next taking a blending brush, blend the edge of the eye shadow in the crease area in a wiper motion. This basically blends out the harsh edges of the eye shadow and gives a more "natural" look to your eyes :)

8. Next apply a brown liner on your LOWER lashline. And apply a thin black line of liner on your upper lashline. The key is to have a lighter liner on your lower lashline and a darker shade on the upper lashline. This makes the eye pop up and not look tired!

9. Then apply some highlighter shade to your browbone area. I strongly recommend MAC Ricepaper for skintones NC36 to NC45.

10. Finish off the eye makeup with a lavish coat of volumizing mascara :)

11. Next apply a neutral looking cream blush patting it with your fingers... Then apply a matte powder blush of your choice on top of it very lightly.

12. Apply your favorite nude lippy and top it off with a hint of clear gloss only in the middle of your upper and lower lip.

13. Finally finish off with a sweep of highlighter on your cheekbones, bridge of your nose and the center of your forehead. 

Optional 
Now, these optional tips are to be followed according to season and occasion.
1. If it's Summer, instead of the cream and powder blush combo, you could use a bronzer on your cheekbones and the bridge of your nose and bit on your chin. This gives a sun-kissed look.

2. If it's the rainy season, be sure to go for water-proof makeup and instead of a nude lippy go for a bright shade like Coral/Pink. 

3. If it is the Winter season, you can go for a richer shade of lipstick like Berry, Plum or Fuschia Pink or my favorite Red :)

4. If the occasion asks for a "dressy" look, instead of a neutral eye shadow go for a golden eye shadow and instead of nude lips go for a brighter shade.

5. If you are getting ready for office, you can altogether skip the highlighter.

6. Finally, if you just want a change from the routine natural looking makeup, use a pink eye shadow on your lids and define your lower lashline with kohl instead of a brown liner :) But remember to line your upper lash line with a black liner.
OR
Line your upper lashline with a fun, colored liner like Metallic Blue, Silver Grey or even Green :)

I hope this post helps you Reshma and even anyone wants to add anything else then please do so through the comments section :D 

Thursday, April 5, 2012

Reader Request: MakeUp for Specs Wearers

Its been a while since Anks of NoviceMakeUp asked me to do some makeup looks for specs wearers. Of course the lazy bum that I am, I had been shelving it and the sweet patient friend that she is, she kept on reminding me from time to time. Then there came a point when I could not live the guilt anymore and so I finally did it :P Anks... thank you :) So lets get started...

Let me be honest, for doing this post I did a lot of research on the internet and well I came across a lot of Dos and Donts... Some made sense and some didn't... So what did I do? Well I made my set of rules and I am sharing them with you :) You can should adapt these pointers of my mine to what suits you best and what you are comfortable with...

Now let me tell you all as to why I am going to proceed with the post... I am first going to list out tips that must be followed while wearing spectacles. Next I am going to illustrate to you all a few looks that I think would look fabulous  when wearing spectacles and finally I am going to open the session for further discussion and for your points and suggestions through the comments section :) So here goes...

Important Pointers to be kept in mind:
Disclaimer: These pointers are for people blessed with Myopic Eyes like moi ;)

1. Glasses in generally are a "huge" face accessory hence it is often a good idea to keep your makeup light when wearing glasses.
  • If you want to go for heavy makeup then I would suggest you to go for rimless or transparent rimmed glasses. These type of glasses are makeup's best friend :)
  • If you have black frames like mine then eye makeup should be a minimum while playing with lip color is recommended :) 
  • If you have colored rims then you have to be very careful with the colors you will use in your makeup, they should not clash with the color of your rims!
2. Spectacles tend to cast a shadow under your eyes and if you have dark circles then it makes them all the more prominent. Hence, it is advisable to conceal at least your dark circles very well and if possible to use a light reflecting concealer like those from Clarins, YSL and Dior. Ok who am I kidding? I did go in search for some "reachable" light reflecting concealers and found that MAC Cover Up concealers are light reflecting and very surprisingly Oriflame makes light reflective concealers too ;)

3. Myopic specs generally tend to make the eyes look smaller and so loads of beauty blogs suggested using a white liner on the waterline. But you guys know na how I much I love a black waterline so I rebelled and then inferred that unless your power is really high like maybe above 3.5 or something, you can give the white/nude liner a skip. But of course ideally the waterline should have a white liner applied :)

4. Smoldering and heavy dark smokey eyes are a huge no no when wearing specs. Yes I never imagined that I would say no to smokey eyes but siigghhhh (btw my sighs are copied from my bestie Manu Sharma) specs means no dark eye shadows on the lids.

5. Continuing with point 4, you must avoid wearing dark shades of eye shadows with specs. Try going for lighter and neutral shades. But I rebelled and well satiated my thirst for color with some colorful and bright eye shadows. But a strict no to dark blues, dark greens and Purples (Mauve is ok)...

6. Ok one very important thing is that if you are wearing specs then your eyebrows should be very well groomed and should frame your face well... Sparse eyebrows (yup like mine) is a strict no-no for specs wearers...

7. Mascaras are a must for glass wearers as they open up the eyes. Try avoiding wearing mascara on your lower lashline though :)

Now for some do-able looks:
1. The nude and natural look...

2. A subtle and soft smokey eyes (Couldn't help myself) look...


3. The classic, winged liner with Red lips look...

4. The fun colored liner and bright lips look...

In the end let me remind you, its your glasses, your face and your life, do what you want and have fun with makeup, just try keeping the top 7 pointers in mind and you can never go wrong!

Tuesday, March 27, 2012

READER QUERY: How To Apply Makeup on Darker Lids

Dimpal asks...

hi Suma,
i want ur help .. i have duskier eyelids.. colors just refuses to show on my eyelids... i use nyx eyeshadow base and garnier anti dark circle roll on too but thy r nt much help...
thnx n Luv


A lot of us have this issue of having darker eye lids due to which eye shadows do not show up with as much pigmentation as it does on others. But fear not :) Like I always say MakeUp is like magic and it can help you achieve any look you covet and so makeup has a solution for this problem too :) Did I sound very dramatic here? :P

There are three things you can do...
1. Apply a good eye primer before you apply your shadow but you already do that and it doesn't help right? So you'll need to follow steps 2 and 3 :)

2. Use a good concealer, which I am assuming will be 2 shades lighter than your lids and a similar shade to your face. Apply it generously on your lid area till your brow bone. This will ensure a clean and an even canvas to start with your eye makeup. If you have oily lids then do set the concealer with a pressed powder without fail.

3. Invest in a good cream eye shadow base palette. I use one from Oriflame, there used to be a cream shadow palette available with Colorbar as well as NYX too. Or better still if your budget permits then buy some MAC paint pots too :) Use these cream shadow as bases over your concealer application. Then apply your powder eye shadows over these cream shadows. I guarantee some awesome pigmentation with this :)

Do note that after applying the cream shadow base, using a powder shadow is optional. I use a powder shadow over cream cause I have oily lids and I need to set in the cream shadow with a powder one :)

I hope this helps Dimpal... If anyone has any other suggestions do pitch in through the comments section :) It would be highly appreciated! :)

Thursday, February 2, 2012

READERS REVIEW: Your top Make-up "Don't"

We all may either be very proficient in make-up or may not be but we all know can judge what make-up makes a look and what breaks it. Rather than me listing out the "don'ts" and maybe miss out a few, I decided to let it be an open forum and ask you all to list out your TOP "make-up Don't".

So, ladies type out your TOP make-up mistake that people do in the form embedded below and let us all share with each other about what we think is not a good practice :)


Wednesday, January 25, 2012

TIPS & TRICKS: Photography for Beauty Blogging

We were chatting on FB some days back when Taps from realbeautywithtaps asked me to do a post on Blog Photography How-To... We discussed a couple of tricks and then I realised that though none of us here are professional photographers (mostly) but we all could do with some tips and tricks and make our blogs more attractive to our readers. This you see is a win-win situation for blog authors as well as readers after all we all have both roles to play very often :) So how does good photography help us? Well, if you are the author then clear and bright pictures will ensure more readers to your blog and if you are a reader then clear and bright pictures on other's blogs ensures that you get a clear and fair idea about a particular swatch or a tutorial. See? I do make sense! :P

Photography they say have five important principles:
1. Lighting
2. Composition
3. Subject
4. Background
5. Perspective

A cliche that is often used is that the most important rule of photography is that there is no rule but in order to get some attractive pictures for your blog a couple of things regarding the 5 points listed above need to be kept in mind and today we'll be covering them only in terms that may be significant to a beauty blog. Please note that this is not a photography tutorial or how-to, this article is just about some pointers that need to be kept in mind for a successful blog :)

Lighting
1. Natural light is the best light to take photograph of swatches.

2. If you are like me and get almost 0 to no time during the day for your blogging hobby, then take photographs of swatches either in white light or no light. Yellow light is a strict no-no. No light you ask... You see I have had the experience that my swatches exhibit the truest colors in 0 light (darkness) with flash on. Sometimes, with flash you do not get the true color of a swatch, then post two pics, one with flash and another without :) Simple!

3. If you are taking a pic of your look where the depiction of the true color of your eye shadow or lipstick is not important, then take pics in yellow light. Yellow light flatters our skin and gives it a flawless and a glowy effect :)

Composition
1. When reviewing a product it is important to keep the product in focus in the pic even if it means taking many pics from various angles.
See how I put focus on the box and nothing else.
2. When clicking pictures for a particular look where you want the eye make-up, lips and the whole face to be highlighted, it is a good idea to click a pic of the eyes alone, lips alone and then maybe the whole face. This basically highlights each subject (eyes, lips, face) in your post.

3. When clicking pics in order to illustrate your make-up stick to just head shots, no point in clicking your whole torso as well :P

4. Sometimes when clicking a facial pic, it happens that you look at the camera and the pic shows you a squint (happens with me all the time). In order to avoid this turn your head a little sideways and then look at the camera. It is a more flattering angle too!

5. Pearls, shells, glass, beads, wood make for some great accessories to complement your subject. 

Subject
1. Most important point under this is using the "macro" option in your cameras. It is basically depicted by a flower sign. This when switched on helps keep the subject in focus.

2. Keep in mind to not post blurred out pics. That is downright lazy and shows that you dont care enough for your blog!

Background
1. As far as possible, keep your background muted, neutral or best is white. This helps in brightening up the picture and keeping your subject in focus.
See how the lipstick shade gets highlighted with the white background and black casing :)
 2. Try not to keep bedsheets and magazine pages as your background. They simply steal away focus from your subject. The idea is that you should not have to search for your subject in a picture.

3. Try keeping your background as plain. If you do need some texture don't get them through prints but through real objects. Like placing MAC lipsticks amongst white pearls (black stands out on white), placing a pink blush pan on a heap of rice, placing an open Red lipstick on some wooden spoons etc.


Perspective
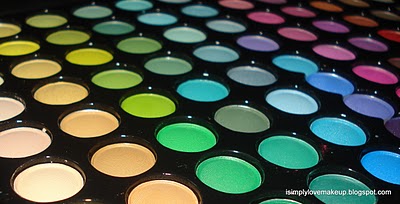
1. Sometimes, its not the product itself but the characteristics of the product that is the subject. You need to change the perspective of your camera's lens in that case. For example when "flaunting" a newly purchased Coastal Scents palette. Here the point of focus is not the palette tray but the magnitude of colors it has right? So maybe instead of taking a front shot you may experiment with an angled shot something like this:
NOT Attractive!
Attractive! :D

Miscellaneous
1. Do not use a mobile phone cameras but a proper digital camera for clicking pictures.

2.When taking self shots, make it a point to click lots and lots of them from various angles. Later you can sort through them and pick the most attractive and the best out of the lot :)

3. I'll again reiterate the fact that lighting is the most important factor in making a photo appear attractive and appealing. 

4. When taking a head-shot to show off your eye make-up or lip make-up be sure to not use a foundation with SPF. It makes you appear un-naturally white in flash.x

P.S. I do not claim to know much about photography, but I do know good pictures and bad picture when I see them. Also, I do not claim that the pics on my blog are perfect, far from it actually but I am learning as well :) 
Do put in your comments and any pointers if you may have :) 

Monday, January 16, 2012

READER QUERY: How to wear a Red Lipstick

Going ahead with the series of posts on red Lipsticks, I today have a query from Poohkie of Poohkie's Place about the right way of sporting a Red Lipstick. Of course I have tried to answer this to the best of my know-how and yes I did do a bit of internet research as well on it, but I am sure there are points that I couldn't think of, so I implore you all to do your bit and pitch in through the comments section :)

Also, let me clarify that I may not be an expert on Red Lippies and neither do I follow these "every time" I sport a Red lip but I am listing down pointers that I myself should ideally adhere to and find helpful :) Out of these you could make your own permutations and combinations according to what suits you best...

So here goes...
1. First and foremost is to have well exfoliated and moisturized lips before you apply a Red lippy.


2. Many of us have pigmented lips and even for those who have unpigmented lips. in order to bring out the true color of the lipstick, it is a good idea to apply foundation on your lips as a base. I do not recommend applying a concealer on the lips cause I have found it to be a bit drying.

3. Then comes the issue of "bleeding". In order for you to prevent bleeding of your Red lipstick, it is a good idea to fill in the lips with a lip liner. Not only does this help with "bleeding", but it also helps you shape your lips.

4. Now this step is something that I follow religiously even if I skip the first three and that is to apply the Red lippy n the inside of your lips/mouth as well. Cause nothing is as ugly as the fact that when you smile or laugh and the pale pink of  the inside of your mouth is visible in stark contrast to your Red lips.
Hate the "pale pink" visible in the inside of the mouth!
5. Keep your blush natural and as you all know keep the eye make-up light or to the minimum :) We don't want to end up looking like this now do we?

6. Sometimes, it happens that we are hopelessly in love with a particular shade of Red and it on application looks atrociously stark on us. In order to retain the tint of Red but not look stark what you can do is kiss into a tissue a couple of times. You will be amazed to see how that helps! :)

7. If you have thin lips like mine and you are applying a matte Red lippy, then I would suggest you to apply a bit of clear gloss only at the center of your lips. It gives an illusion of fuller lips :)

8. Another important point to bear in mind is that Red lips have a tendency to highlight your skin and complexion, which is why it is of utmost importance that you have your foundation, concealer and other base stuff in place. Red lips look best with a matte face. For ladies like me who prefer a "dewy" look could go for a matte foundation with a bit of highlighter in order to avoid the starkness of a matte face!


9. Also, try your best to go for a transfer proof Red lipstick in order to avoid it getting all over your teeth.
Paris Hilton with Red Lipstick all over her teeth!
10. Finally, the most important part and that is the tool to be used to apply a lippy. Red lipsticks are a tricky where the shape of your lips are concerned. Somehow even the most minor of errors get highlighted with a Red lipstick. Your lipstick going out of your natural lip line is something you want to avoid here. Hence, if you are confident enough to use the lipstick as is then go ahead! And for those of us who aren't very well versed with that, I would suggest using a lip brush for that precise application.
Hope this helps and yes all of you are welcome to share with us your little tricks that you follow for applying Red lipsticks :)

Tuesday, January 3, 2012

Tips And Tricks: I learn't along the way

Don't we all wish, ok at least a few of us do that when we were born, we were already equipped with perfect eye shadow blending skills, had a steady hand for applying an eye liner, applied nail paint with perfect precision, knew how to match a foundation shade with our skin tone and of course knew which concealer perfectly suited us! Sighhh... but then God didn't really make this world about make-up and hence did not deem necessary to give us girls these skill through our genes... But we have made our world revolve around makeup haven't we and so we've had to evolve and adapt after all survival of the fittest is the supreme law of nature isn't it? It does make perfect evolution sense now doesn't it! Charles Darwin would be soooo proud of me! *teary eyed*

Am I even making sense here? :P

What I really want to say is that even if we were not born MUA but we have left no stone unturned in picking up little skills from here and there, from other beauty blogs, from youtube videos and of course from practice and experience. I myself have picked up little tricks and tips along the way and I now would like to share it with you all :) Am I not really NOBLE? LOL.. yes people tell me I am! :P I just love some flattery here! ;)

Of course my list is in no way complete and I guess I shall keep appending new pointers to it :)

So here goes...
Eye Make-Up
1. Whenever applying eye shadow on your lids, use a "tap tap" motion rather than sweeping. This results in better pigmentation.

2. A blending brush is a must when trying to achieve a smoky effect. Without the perfect blending of eye shadows, it ceases to be a smoky look. Recommendations: MAC 217/224, Sigma E25, Faces 106

3. Ladies with dark circles should avoid heavy smoky eyes. If you really want to go for it then master the art of concealing :)


4. If you have very oily lids (like mine), then using a fast drying eye base/primer is a must topped with compact! Recommendations: MAC Paint Pot in Painterly/GroundWork, TFSI. UDPP creases on me!


5. If you have deep set eyes, then one must avoid using dark colored eye shadows. It would give an illusion of sunken eyes.


6. A perfect and a flattering eye shadow shade for all Indian skintones would be MAC Mythology.


7. Women blessed with long eye lashes must use a eyelash curler before applying mascara else they do not curve upwards and give a poker straight effect.


8. When applying eye shadow on your crease, make sure it is matte and not shimmer. Matte eye shadow on the crease gives a deep, mysterious look.

9. Always carry Q-tips/baby buds with you. They are the most handy while taking out the goop that gets accumulated near the inner tear duct of the eye. (Ewww? Yes!)


Lip Make-Up
1. Red Lips is for everyone! They are the easiest to pull off and just one single product has the power to make you look Glamorous! Do not be scared of RED!

2. When applying Red lipstick, make it a point to apply it in the inner lip area as well.


3. Blue based Reds make the teeth look whiter.


4. Light Pink lipsticks have a way of making our teeth appear yellower :(


5. Brown lipsticks not nude but brown make us look more mature for our age.


6. For making you lipstick stay on for long, apply lip pencil all over the lips (a nude shade is perfect), then apply you lipstick over it, kiss on a tissue a couple of times and then apply the lippy again. This will ensure that your lippy stays on for the whole night!


7. Exfoliating your lips with cream and sugar once a week is a must. Twice a week in Winters.


8. Lipsticks look different on different people's lips. Hand swatches are more reliable when checking out lipsticks online. If buying from the store then its better to try on your lips. Don't do it yourself! Ask the MUA to do it for you hygienically! This is why I love MAC MUAs :)


MISCELLANEOUS
1. Brushes for eye-makeup are a must.

2. Rather than going for a MAC/Inglot mono eye shadow, go for refill pans and put them in empty palettes. That way they are more cost effective.

3. MAC Lustre Lipsticks are a waste as mush as Maybelline Watershine ones are. They do not stay for more than 1/2 an hour :( After matte, amplified stays on for a longer time.

4. Inglot AMC liners work best with thin liner brushes than flat angular ones.

5. Always apply a highlighter on your browbone and the bridge of your nose. It results in an instant pick me up!


6. When buying a lippy, swatch it on the back of your hand. When buying a foundation, swatch it on your inner arm/fore-arm. When buying an eye shadow, swatch it on your inner wrist.

Hope you all find these tips helpful and I would love it for you guys to share your tips through comments as well :)

And well yes let me tell you all again, I am on twitter. Find me @ISmplyLveMakeUp :)

Thursday, November 17, 2011

Indian Bridal Makeup: My Work and some Tips & Tricks

A wedding is a very important event in one's life. It brings about mixed emotions of joy and sadness alike. Apart from various aspects that go into a wedding preparation, one stands out as a tad bit more important for the bride and that is, the way she wants herself to look on her wedding day. From deciding the color scheme of the makeup to go with the outfit, booking parlours and beauticians and even going for extreme makeovers, we girls are known to have tried it all for our weddings :)
On such an important occasion of their lives my two best friends decided to trust me with their make-up :) They believed in my skills and let me take over the reins of how they would look on their respective weddings... This gave me confidence for doing my own wedding makeup as well. So today I shall be covering three Indian wedding looks that I did for three women who have totally different features, skintones, skin types and wedding outfits. Was it a challenge? Yes it was... Was I nervous? You bet I was... But apart from all this there was this warm feeling of knowing how much not only my best friends but also their mothers trusted me and that was enough for me to fight my apprehensions and get down to work :)
The three brides in their various avatars... 
PRAJAKTA
A Daytime Function
Maharashtrian Bride

MANU
Punjabi Bride
A late night early morning function
 ME :)
Manipuri Bride
Bengali Bride
I had a Maharashtrian wedding (Prajakta's), Manipuri Wedding (my own) and a Punjabi wedding (Manu's) to cover. Although all three weddings expected me to do very different looks, the underlying principles and rules remained the same and in this post I will list down some pointers that brides-to-be need to keep in mind if they are planning to do their own wedding makeup. So let's get started :)
Primer -> Foundation -> Finishing Powder
1. First and foremost, make sure your foundation does not contain SPF. SPF contains titanium-di-oxide that reflect due to a camera's flash and makes your face look much more "white" than it actually is.
I have used Revlon Colorstay Mineral Loose Powder Foundation for Prajakta as she has oily skin, Maxfactor Second Skin Foundation on me and Maxfactor Miracle Touch Liquid Illusion Foundation for Manu.
2. A face primer is extremely important! It not only helps in keeping your foundation stay on longer, but it also helps in controlling shine, prevents oxidation of the foundation and makes applying a foundation a much smoother process. I used MAC Prep+Prime Primer for all.
3. Your foundation should exactly match you. Please don't aim to miraculously look fairer or duskier than you really are! If you are using a mineral foundation, then get yourself a shade lighter as mineral foundations darken a bit on becoming warm. For exactly I am an NC 36 but I use MAC Mineralize foundation in NC30.
4. We all know that when we apply foundation to our faces, the neck should not be skipped. But it is also important to keep in mind that foundation should be applied to ones ears as well.
5. If you are using a liquid foundation, you must top it off with a compact or loose powder to set the foundation. As I used a liquid foundation on me, I set my makeup with Oriflame's Air Soft Loose Powder. However, as Manu and Prajakta both used powder finish foundations, we avoided using a setting powder on it.
Eyes
1. First off, never ever attempt to do a heavy smoky eyes look for your wedding. It doesn't photograph well under those glaring yellow lights, plus it'll give you panda eyes by the end of the ceremony, due to havan induced watery eyes and the emotional vidaai ceremony...
2. When using eye shadow, never ever opt for matte and glittery. Go for satin or pearl finishes eye shadows only for your wedding. They give a subtle sheen but do not look overly glittery and hence weird in heavy flash photography. I opted for eye shadows in the form of loose powders only. They give the perfect sheen and when applied wet stay on for like ever! I used Sparkle Dust stack in various colors by Faces Cosmetics.
3. Always use an eye primer. Come what may! Primers help your shadow stay on longer and also "pop-out" the color of the shadow. Yes! An eye primer is required even if you have applied a face primer earlier. I used MAC Paint Pots in Painterly and GroundWork and NYX Eye shadow base in Skintone.
4. Avoid using kajal and rather opt for gel liners to line your waterline. Kajals tend to run out and smudge resulting in Panda Eyes. I used Maybelline Lasting Drama Eye Studio Gel Liner for Manu and me and used Chambor Eye Pencil for Prajakta.
5. Line your upper lids with gel or liquid liners only. And make sure they are waterproof. I used Colorbar Waterproof Liquid Eyeliner.
6. You may choose to wear false eyelashes but make sure that you use transparent drying glue and do not go for embellished falsies. Let the falsies give you a natural looking luxuriant eye lashes rather than OTT decorated lashes that make you look ridiculous in your wedding photos. Manu and Prajakta both have beautiful long lashes so we didn't use any falsies on them. But I have non-existent lashes and hence I used MAC lashes with DUO adhesive.
7. Make it a point to use mascara and loads of it. And of course it goes without saying that the mascara should be waterproof :) For example, for a daily basis I use Maxfactor's False Lash Effect Mascara but I used Maybelline's Colossal Volume Waterproof mascara for all the weddings.
Lips
1. If your lips are inherently dry or has lots of fine lines, then I suggest using a lip primer. But it is optional.
2. Always use a matte lipstick as they have longer staying power but you may top it off with some gloss. I prefer using Colorbar Velvet Matte lippies for such occasions.
3. Using a lip pencil is a must. I recommend Maxfactor and NYX.
4. Never wear light shade of lipstick. Always go for a darker shade. They look better in pics.
5. Remember that it is not important to match the shade of your lipstick to your outfit. That looks amateur! Go for a shade that compliments the color of the outfit and is a bit darker. I am uncomfortable wearing maroon and purple lippies, but my Sagan/Engagement Saree was a Purple and Maroon Kanjeevaram, so I used a combination of Red and Hot pink lippy that gave a pinkish reddish look which looked perfect with the saree.
6. For your lippy to stay on for long, do this trick. First line your lips with a liner and then fill the complete lip with the liner. Then apply your lipstick over it. Let it set then kiss into a tissue a couple of times. Then again apply the lippy and Voila your lipstick will last you the entire evening!
Blush
1. Unless it is a day even, stay away from light pinks, peaches and corals. Nightime functions should see warmer toned blushes. It gives a gorgeous tint in yellow light. I used Colorbar Blush in Plum Brown and Maybelline Blush in Apricot Flush.
2. If you want a dewy look then go for a cream blush and top it off with a powder blush. This gives you a dewy look rather than an oily one :) I use NYX cream blush in Golden.
3. Unless your jewelery and outfit have silver, white gold or platinum, stay away from silver glitter in any of your makeup products.
Bronzer/Highlighter
This is one product that I use on a bride without fail. It gives a warm finish to the whole make-up. Remember to use it with a light hand though. I would suggest you to apply it on you cheekbones, center of the forehead and centrally vertical on the chin.
Random Pointers
1. Your make-up should be waterproof.
2. Don't overdo the make-up!
3. Avoid using pink lippies as they make ones teeth look yellow!
Hope this post helps you guys :)

Saturday, November 12, 2011

How To: Match My Makeup With My Outfit...

Has it ever happened to you when you very excitedly decide on an outfit that you want to wear for an occasion but are at a complete loss of the kind of makeup palette to choose? Have you ever been left at the curb wondering if a blue eye-shadow with a blue dress would seriously be a good idea? Let me talk about how I prefer choosing my makeup palette with the color of my outfit... It is in no way the only way or may be the most correct way to go about but it sure helps me out of sticky makeup situations ;)

My mantra is COMPLEMENTING. I in no way ever go about matching the colors in my dress to the color of my eye-shadow or liner or lipstick. All I do is decide on the colors that complement the colors in my outfit. This is a rule that I follow in general but I do have some exceptions to this rule of mine. Also do note that the colors in my make-up do follow a certain rule where the occasion or the time of day is concerned. For example my color palette for work certainly revolves around neutrals, taupe, browns and subdued greys for the eyes and natural pinks, nude and light browns for the lips. But come a wedding or a night out in the club and I unleash the drama queen that I am through my makeup :P

So anyways, coming back to complementing colors, what I mean here is that rather than blindly going for a matching-matching contest between the outfit color and the eye-shadow color, it is preferable to choose your lip color or eye color that would complement your dress. For example, if you are wearing a red dress, I would refrain from going for a Red Lip... Rather I would go for a say smoky eye and a neutral lip look, or if I am wearing a Navy Blue outfit, I would go for golden eyes and red lips. Imagine it and I am sure you will get a hang of it ;)

Here is a little chart that would help you understand my thought process while deciding on my makeup according to occasion:
1. Indian Weddings and similar functions
    Your outfit be really bright and colorful with a lot of either golden, silver, bronze of copper... Would suggest you to go for dual eye shadows blended well out of which one should definitely be either golden, silver, bronze or copper matching your outfit and the other shadow should be of the color that is least present in your dress. Lips should either be pink or Orange or Red according to the family of colors present in your outfit.
Copper eyes with Red Lips
Golden and Cranberry Eyes with Fuschia Lips
2. Formal Evening Occasions
    Either go for nude shadows and bold matte lips that complement and not match the outfit, or go for bold eye makeup and nude lips.

3. Casual Occasions
    Nude lips with bright complementing eye shadow shades or a bright lippy with slightly defined eyes :)

4. Work Wear
    Accented eyes and nude lips :)
Defined eyes and nude lips
Let me know if you would like to me to write about any specific occasions, functions or outfits... I would love to suggest you on them too :)