Showing posts with label Makeup Tutorials. Show all posts

Tuesday, July 3, 2012

Simple & Elegant Dotted Nail Art: Photo Tutorial


Hi…. all ladies…..!!!!!!

I should greet all nail art lovers today. This is a very simple nail art. I have very short nail base. I have always envied ladies with long nails. It is a boon which I always wish to demand. Yet, I have somehow managed with my short stout nails for so many years. There is no much scope for lot of designs on short nails. Out of so many years of experience with short nails, I have found that short nails are comfortable with dotted designs. So, today's nail design will comprise of several colorful dots.


Let the pictures do the maximum explanation of this simple and elegant dotted nail design.

Step-by-Step Instructions:

Step 1:

After preparing the nails for the painting, I applied base color on the nails. This is my all time favorite color.


Step 2:

Next, place two dark brown dots on the base color, first near the tip of the nail and second right below the first dot. Make sure the base is completely dry. The brown dots can be done with the brush that comes along with the nail enamel bottle.


Step 3:

Now, a very light shaded pink dots on the brown dots. The pink dots are to be smaller than the brown dots. So, I used a tooth pick to draw the tiny pink dots.


Step 4:

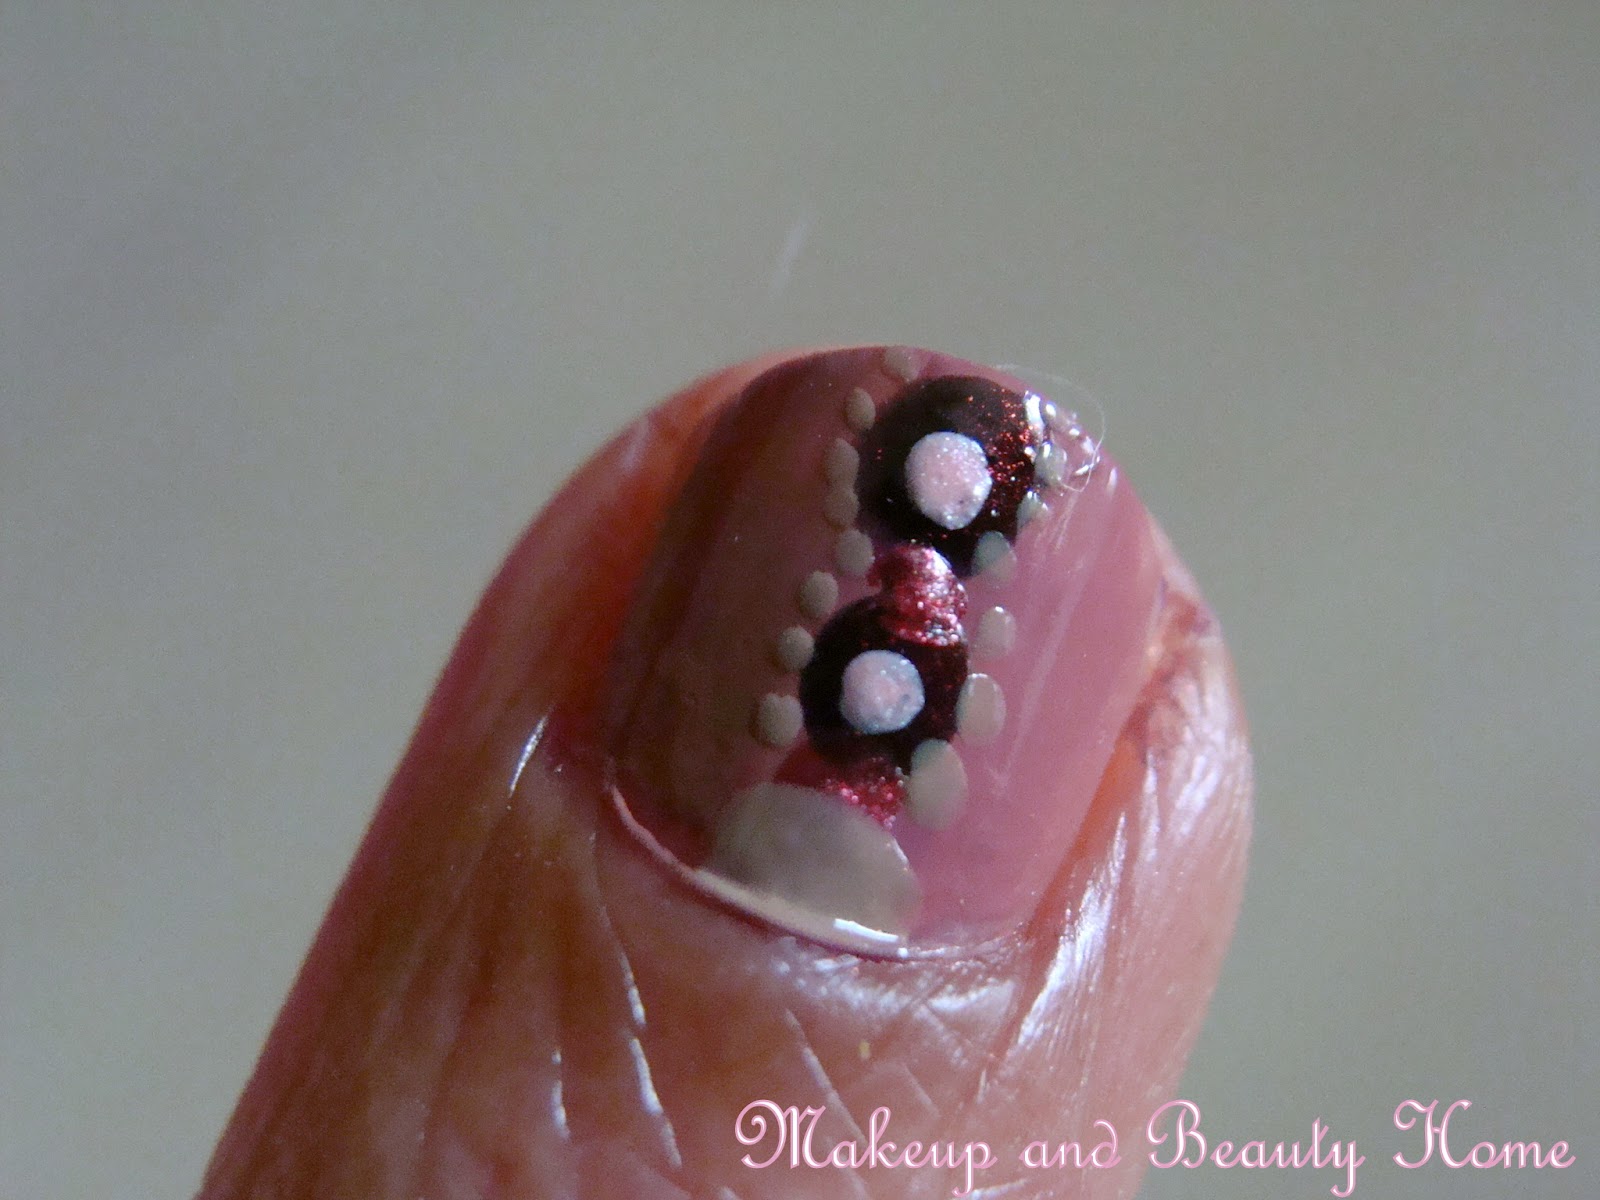
After the dots are dry, take a reddish brown nail color, again on the tooth prick tip. Draw 2 dots, one in between the dark brown dots, another after the second brown dots. (Hope, I am sounding fine. Well, the next pic should explain my words!!). After the whole dotted structure has dried perfectly, surround the entire structure with another most light colored skin color.

There goes the final structure of dots. Done. Optionally, you could top it with a coat of clear color.


Products used:


Editors Note: Hope you liked Chand's Simple & Elegant Quick Nail Art. Thank you Chand for this wonderful Nail Art post. I am loving and trying this soon. Readers, please share your comments & feedback below, so that it would encourage our guest writers.


Important Note:  The person with highest number of giveaway entry posts will win a surprise goodie hamper in this MABH 400 Followers Celebration Giveaway Contest! Enter now and win exciting prizes!!! 

Wednesday, May 9, 2012

Ready for Shopping Makeup Tutorial & FOTD

Hey girls! Good Morning!
I have become too lazy nowadays to post continuously on our blog; forgive me please :P Today, I wake up at 8.30 am [I didn't wake up myself, got a call from my aunt] She said that she wants to go for shopping with me today! I had a quick bath and made my makeup very quick. This makeup look is simple and can be done while going for shopping, friends house or some other nearby places. Enjoy the look and sorry for the bad clarity pics! I am lazy to charge my canon :P


Steps... Steps.. 
 
  • Cleanse and moisturize your face. You can put anything of your wish like foundation, concealer etc but I prefer just a compact if its nearby outing [As all you already know I am lazy]. So here, after cleansing my face, I moisturized my facial skin with Lakme Intense Whitening Day Creme and then topped it with Lakme Rose Powder in Warm Pink Shade [Yes! My all time favorite]

  • Blush? That's something I am not that expert in and also, as already said the 'lazy' thing keeps it at bay. Hence, I skipped the blush :D :D Sorry! If you like blushing, add some mild pinks or nudes.

  • For my lips, I used Faces Canada silk range lip gloss. That's well pigmented and hence I didn't need any lipstick. 

  •  I didn't prime my eyelids at all here [Let's make it quick and simple] I used a light pink eyeshadow near my inner corners and a moderate shimmery pink on center of the eyelids and outer corner. Blended both and that's it! I lined my eyes with a black eyeliner and applied kohl on waterline. Just for extra fun, I slightly applied Deborah Milano Metallic Eyeliner[Purple Shade] over my black liner :P Can you able to see it?

  • What else? Ah I left something! I altered my eyebrows with a pencil and wore my earrings. That's it :) The simple shopping makeup look is all done. [Oops I forgot to comb my hair properly, forgive me]

Now don't get scared :P Here's my before and after pics


Hope you enjoyed this simple 'Ready for Shopping' Makeup Look. Do drop your comments and love. I am waiting to hear :) [Please forgive me If I scared you with my pics] he he

Tuesday, April 17, 2012

5 minute Party Makeup Tutorial for Beginners - FOTD & EOTD

Hey damsels! I am here with a makeup look today after a long time. Nothing hard, it's just a simple makeup look for beginners to wear for birthday parties and other such occasion. Let me instruct you now how to get this simple look in 5 minutes.

5 minute Simple Makeup Look - FOTD and EOTD


Face


Lips


Eye Look


Instructions:


Face

  • Cleanse and moisturize your face. Make sure to use a matte moisturizer if you have oily skin, to control excess oil secretion for long hours. Dry skinned people should go for a nourishing moisturizer to avoid tight stretchy feel or white patches while applying makeup. A good nourishment in dry skin leads to smoother application and flawless finish.

  • After moisturizing your skin, start applying your concealer on the areas near nose, under eyes and flaws. Blend it well with your concealer brush without any streaky patches. You can also skip your concealer if your face is flawless.

  • When the application of concealer is done, you need to put on your foundation. You can use a powder foundation or a water based one if you have oily skin. Dry skins can go for cream foundation to get blended easily on the dry and rough parts. Make sure to select a waterproof foundation whatever your skin type is, to save your makeup from sweating.
 
  • Brush and dust your facial skin with a loose powder or a compact to set the foundation and even out your skin tone. 

  • You have finished your base makeup now. The other things should be done are eye makeup, lipstick and lip gloss application and blush application (Optional). This makes a perfect and simple party look when worn lovely jewels along. Grand jewels suit with simple makeup look well than the overdone makeup.

Eyes


  • We have already applied a concealer to hide those dark circles and flaws around eyes, so no need to add anything extra for this simple makeup look. For a long staying powder of your eye makeup, do use a primer and set it with a loose powder again. One can also skip this step as this is optional.

  • If you are a beginner in using eye shadows, start with a single shade. Gently stretch your eyebrows with fingers upwards and notice your eye area. The entire skin covering your eyeball is the "Eyelid". Eye shadow shouldn't be applied over the eyelids as it may result in overdone look. Using your eyeshadow brush, give a washout of any subtle shade on your entire eye lid.  I have chosen a light pink shimmery shade here.

  • For double shaded eye look, mix a dark shade with your light one.  Gently apply a dark brown or ash eyeshadow near the outer corner of your eyes and blend both colours carefully with a plain brush. I have used a choco brown shade from Deborah Milano Trio Eyeshadow set and a pink shade from the same one. The pink is a light milky shade with visible shimmers while the brown is deep and less shimmery.

  • After the eyeshadow application is done, line your eyes as usual with your eyeliner and use kohl to highlight your waterline as per you wish. If you are planning to apply a coloured eyeliner to the occasion, make sure to draw a thin line with your black eyeliner first on the upper lash line before lining with the colour eyeliner. This trick will define your eyes beautifully! Put mascara and allow it to dry (optional). Your eye makeup is done.

Lips and Cheeks

I have done the lip makeup very simple here. I didn't even line my lips as I was in hurry to step out. I have just put on my Deborah Milano long lasting lipstick shade 07 along with Nivea Glamorous Gloss Pink Sugar Lip Gloss. Wearing a lip liner before putting on your lipstick is highly recommend. This will prevent bleeding of your lip colour.  I have used a light coral shaded blush from Nature's brilliance by sue here. Simply blend little amount of blush in your cheek apple, if necessary define your cheekbone.

Tit bit: Carry a compact and tinted lip balm on your handbag always. This will prevent your oily look and help you when your lipstick fades. Soft wiping tissues should also take place in your bag throughout the day.

Hoped your enjoyed this simple makeup tutorial. Do share your views and comments about it. Do also let us know if you have any particular makeup tip that you swear!