Showing posts with label Homemade Cosmetics. Show all posts

Wednesday, May 29, 2013

Potato Skin lightening Bleach at Home

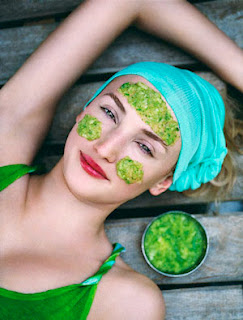
Hello readers! I think most of the people are tired of using chemicals bleaches and spoiled their skin finally. Chemical bleach simply bleaches your skin, makes it too sensitive and thus causes bad skin even if you go out in sun for an hour. The bleaching effect also disappears within few days and gives you a dark and rough skin! What can we do at home to lighten our skin and vanish black dark spots? Which is the natural product works best for bleaching our skin safely? A simple answer for this question is POTATO :) Yes! Potato is an excellent bleach which can improve your complexion faster than any other chemical products. It's a natural skin lightener which we can use at home. I am going to give you all an excellent bleach recipe for all skin types! Enjoy! Go to your kitchen and collect potatoes :)

POTATOES IN MY KITCHEN


INGREDIENTS
  • Potato
  • Rose water
  • Lemon juice (Optional, for oily skin type)
  • Honey (Optional, for dry skin type)

METHOD
  • Peel off the skin of a potato and grate it.
  • Add a little amount of rose water and grind the grated potato to make a paste. This is the base of our bleach cream.
  • Add lemon juice to this paste if you have oily skin and honey for dry skin. You can also simply use this paste without adding anything, if you are a normal skinned person.
  • Now, you can use this paste over you skin and wash it off after 15 minutes.

RESULTS
  • Instantly brightens skin. A best before party bleach to use at home.
  • Regular use of this natural facial bleach will remove the sun tan completely to give you a fair complexion.
  • This bleach removes blemishes, dark spots, acne scars and lightens your skin fast.

NOTE : For best results, use twice or thrice in a week. This potato bleach recipe may cause a light tingling sensation but this is perfectly normal, it means it's working on your skin to remove the dead cells and unwanted tan.

Let me know your experience, write your feedback to me after trying this bleach recipe at home! :)

Friday, October 5, 2012

How to Make Lip Gloss with An Eyeshadow? [Photo Tutorial]

Hello Beauties,
Today, I am going to present a photo tutorial on How to Make Lip Gloss with your Eye shadow. Strange? No! I got this idea when I was planning to visit my cousin Vicky's home after long days. I wanted to gift her something as we are meeting after a long time. She loves strawberry scented cosmetics and hence I gave her the Lakme Fruit Blast Strawberry Face Wash when we met last time :) And this time, I searched for something 'Strawberry-sh' in my beauty product case and I found out this Aloe Veda Strawberry Lip Balm. Hmm I have reviewed this lip balm long ago here and it shows no tint on the lips even though it looks colourful! I love colourless lip balms but still I prefer the tinted ones when I am lazy to wear my lippy. My cousin is fond of tinted lip balms too hence I jumped into the experiment of making a gloss for her using this Aloe Veda Lippy and my eyeshadow :D
    I though of using any of my pink/plum lipsticks for this but suddenly I thought 'Why not to make it up with an eyeshadow or an eye pigment for a change?' That seemed as a good idea for me too and hence I picked this bright pink shimmery eye pigment from Nature's Brilliance by Sue. Now let us check how I made the lip gloss in 4 simple steps. Go ahead and enjoy the pictures and tutorial! :)

lip balm, eyeshadow, spoon


Things you will need:

  • A lip Balm (Tinted or colourless, anything would do good)
  • A pink/plum Eyeshadow (You can also go for any other shade(s) you wish)
  • A clean spoon
  • A ladle

ingredients, swatches


4 Simple Steps to Make Lip Gloss with an Eyeshadow:


Step 1:
Collect your lip balm in a ladle with a clean spoon. If you are using a tube lip balm for this DIY lip gloss recipe, then cut it off with a clean knife and collect it in the ladle. You can also use thick yummy smelling lip butters for this to make your lip gloss rich! Next time I am planning to use the Himalaya Lip Butter which has a very sweet shea butter smell. (Yummm...)

lip gloss


Step 2:
Add required eye pigment/eye shadow to the ladle of lip balm. If needed you can add more later, hence add a little by little until you get the desired pigmentation. Here, the shade I used is a bright pink shade with tiny pink shimmers in it. This would add a nice shine to your lips. However you can also use matte shades for a shimmer-free lip gloss finish. If you have many same kinda shades in your eyeshadow collection, recycle them as lip glosses!

lip gloss, eye pigment, eye shadow


Step 3:
Now mix both the lip balm and eye shadow together with the clean end of a spoon. Mix well without any clumps. Swatch it in your hands to check whether the pigmentation is enough for you. If you want more opaque finish, add some more eyeshadow . This particular shade I prepared looks yummy isn't it? I feel to keep it myself without gifting her lol :P (Shhh...)

lip balm, eyeshadow, lip gloss


Step 4:
That's it we are almost done. Now heat and melt this lip gloss and fill it up in the same lip balm container. Allow it to cool down in room temperature (This will hardly take 2-3 minutes) and you're done with your DIY lip gloss made of eyeshadow. Enjoy!

Homemade DIY lip gloss


My Homemade DIY Lip Gloss Swatch:

It is rich, thick, moisturizing and has a moderate pigmenation with tiny pink shimmers. You can top matte lipsticks with this lip gloss to get that shimmery shine. If you are not a lipstick person, you can just use this plainly on your lips anytime; this lip gloss is suitable for day/night time wears and also for work.

Homemade DIY Pink Lip Gloss Swatch


See how I packed the DIY lip gloss gift :) I hope she (my cousin) would  love it. What do you think girls?
lip gloss, DIY, gift


Hope you enjoyed my photo tutorial on making this DIY Lip Gloss with an Eyeshadow :) Did you like it?

Have you tried any such DIY recipes at your home? Share below; I am waiting to hear!

Friday, April 13, 2012

How to Make Your Hair Wash Cream at Home - Photo Tutorial

As soon as summer begins, our hair starts getting damaged by the harmful UV rays and heat. Due to this, daily hair wash becomes necessary in every person's hair care routine. We face split ends, oiliness, dandruff, sweating and many other hair ailments due to regular shampooing. Today, I am going to show you the steps of making your own hair wash cream at home easily. In this recipe, shika is used as a base. Shika is a natural made hair wash powder, widely used in India. You can make your own at home or get a ready made pack from your nearest shop. This hair wash cream is suitable for all hair types, however a little alteration would be needed to make it suit your hair. Usage of this hair cream instead of your regular shampoo not only acts as a natural side effect free hair cleaner, but also adds a perfect shine and smoothness to your hair. Let us move on to the recipe now.

Things you will need:

  1. Shika Powder - 2 teaspoons
  2. Curd - Required
  3. Hair oil - 3 drops

Instructions

Step 1

Take a small clean bowl and add 2 teaspoons of  homemade or store bought shika powder into it. I am using the Meera herbal hair wash powder here.


Step 2

Pour required curd to the shika powder. Curd acts as a natural hair conditioner and adds shine to dull hair, hence you can skip your conditioner.


Step 3

Blend well to form a thick paste.


Step 4

Now add 3 drops of any light hair oil to this paste for a nourishing effect on your hair. Make sure to avoid thick oils like castor oil and go for thin filtered oils, because they may weigh down your hair. I have used a thin hair oil from Garnier. If your hair type is extremely oily, then skip this step and add few drops of lemon juice to the cream.


Step  5

Now mix all the ingredients well and keep the bowl inside your refrigerator for 20 to 30 minutes. This process allows the ingredients to mix well together and gives a smooth soaked shika hair cream.


That's all. Your homemade hair wash cream is ready for use now. You can apply it on your wet hair soon after taking out from the refrigerator for a cooling and relaxing effect. This hair wash cream cools down your body, refreshes your eyes and prevents summer acne. However, allow it to warm in room temperature before using if you have cold body type.

The texture of the cream should be normal to runny for a perfect application. This doesn't lather much as your shampoo but thoroughly cleanses out all the dirt and oiliness. Plenty of water should be used to wash out the cream thoroughly. Make sure to choose a fine shika powder to avoid residues.

Texture of the Homemade Hair Wash Cream


 I have been using this homemade hair wash for ages and it gives great results on my hair every time. My hair turns visibly shinier and smoother after every usage. I can also feel my hair growth faster than before as there is less hair loss. This above preparation is made for my sister and I will be washing my hair tomorrow with this homemade hair wash cream.
"Hope you find this hair wash recipe useful. Submit your sweet opinions and comments below in the comment section. In case of doubts, feel free to ask!

Monday, December 12, 2011

How to Make Kajal (Kohl) at Home - For Bright and Healthy Eyes

Most of the women love wearing kajal on their eyes everyday as it highlight eyes and gives a bright look :) I got an idea of making my own kajal long before and successfully made it today! :D It really came out well and I wanted to share this secret procedure with you all. I hope you will like this post. Kindly note down the steps, make your own natural kajal and wear it everyday. This cools eyes and refreshes it, thus your vision gets better with regular use. I also suggest you to use this kajal every night before going to bed for bright and beautiful eyes. I have never felt such a cool feeling in my eyes like I felt today, I am really in love with my natural kajal. Let me tell you how I made it..

This is how it looks on my eye:


Things you will need :
  • Almonds
  • A long needle (A compass would be better though)
  • 2 same sized flat bowls ( Nice if not a conductor)
  • A long steel plate
  • A small container (To store the Kajal)
  • A drop of clarified butter or almond oil
Method:
1. Take an almond and carefully pin the needle into it's center, without breaking it into half. It should be like this..


2. Now you need to arrange the bowls and plates. Place two bowls in a straight line, there should be little distance in between them. The bowls are our stand. I used a steel bowl as I don't get a wooden one :( you can better use a wooden box or even a fireproof stand. Now place the steel plate above the stand.


3. After arranging, take the needle or the compass in which you pinned the almond, and wrap it's end with an holder or rough cloth carefully. As needle (iron) is a conductor, the heat will pass and you may burn your skin. Now you need to light the almonds and make them burn. Almond has oils and so it will act as a fuel for burning. I just simply switched on the gas stove and showed the almond in the flame for few seconds, it started burning. You should now gently and carefully hold the burning almond in between the bowls and below the plate, where there is free space. Take a look at this picture to make sure. (Sorry for the clarity :( )

4. A single almond will burn for about 2 minutes, after it stops burning and throw it off and do the same procedure with 4 to 5 almonds or as much as you need. You can see a black ashy layer forming on the bottom of the plate. This ashy layer which is formed by almonds oils, is gonna be our super natural kajal :) Take a look at the picture below, this is how the dark black ash of almond looks.. ( I am gathering it to store in my kohl container :D )


5. Now you have to gently scrap off the ashy layer with a knife or a steel scale as I did. Gather it and put it in a paper. Now carefully, drop this whole ash mixture into your container. I used an old empty Vaseline jar. After you stored the almond ash in the jar, add only a single drop of clarified butter(ghee) or almond oil. Mix well with a teaspoon's back side. Store it in a cool dry place. We made our own natural kajal now :)


The Shades on my hand
First one - Two swipes 
Second one - Single swipe


My Take on this Homemade Almond Kajal
I never reviewed my own prepared cosmetics before and this is the first one :) and my favorite one too. I really loved this kajal as it doesn't irritate my eyes even a bit as other chemical ones do. I had a great cool feeling soon after I applied it. It's my darkest known kajal ever. Yes! It is really so dark. It has almond properties which are good for the eyes, I heard that with regular use it will even make your vision clear. For beautiful, clean white eyes everyone should prepare this one and use it everyday, at least at nights.

Things which I liked about it:
  • Dark shade which many girls will like.
  • It is chemical free, so no need to fear about side effects.
  • This one can even be used on baby's eyes as it's very cooling and mild.
  • Cheap to do, beats even many expensive kohl's in worth.
  • More than all the things, it is healthy for eyes and makes the vision clear.
  • Refreshes eyes and cures dark circles with regular use, as it has cooling sensation.
Things which I don't like:
  • As this is homemade and chemical free, it might smudge. You cannot expect this one should be smudge free but it doesn't smudge much for me. I felt this is same like the other kajals in smudging.
  • Very very dark in shade, so it might be tough to remove it even with makeup removers.
Really no other cons! It's a great homemade recipe which I made :) and I wish to use it throughout my life. It's very cooling and makes my eyes healthy. I am in love with my natural almond kajal! I strongly recommend everyone to make your own and use everyday. Share it with your friends in Facebook and tweet it (It's my kind request) and help them to get beautiful bright healthy eyes!

Friday, December 2, 2011

Homemade Cleanser for Fair Complexion

I would like to remind you all once again, pale and bleached skin is not beautiful as most of the people think. They run behind a myth called "Fairness". They all need whiter skin, so they bleach it with chemicals and spoils the skin texture. What do you get by bleaching your skin and treating it with chemicals? You can achieve a temporary brightness, also it will never look healthy for sure. Soon after bleaching, you will get allergies and rough skin. No use of worrying after that, so please do avoid chemicals over your skin.
Dark or fair, a skin is beautiful only if it is clean, clear and soft. There are many people who have lovely dark complexion without any blemishes. In this post let me give you some effective natural home remedies which helps skin to get rid of blemishes and get brighter than before. Glowing skin is beautiful!! You have to follow the below cleansing tips without fail to achieve a lovely bright complexion.


ROLE OF CLEANSING IN SKINCARE
Cleansing plays an important role in the health and beauty of your skin. You should choose a perfect cleanser for your skin type seeing whether your skin is oily, dry, or normal. Personally I recommend using Clean and Clear Foaming Facial Wash if you have extremely oily skin and Ponds Daily Face Wash for dry skins. You should keep in mind that in winters, you should be aware of choosing a correct cleanser hence your skin loses excess moisture. I have normal skin and I use Ponds Daily Face Wash in winter :) It cleanses my skin gently without leaving it tight or dry.
HOMEMADE SKIN CLEANSERS FOR BRIGHT FAIR SKIN
Other than these branded products, you can also go for natural homemade cleansers to achieve a beautiful complexion! :) It is so simple to make your own cleanser.

Skin brightening Homemade Cleanser
  • Take 2 teaspoons of gram flour, add some green gram powder, few drops of lime juice and half a teaspoon of grounded oats to it.
  • Add required water to make a thick paste.
  • Apply it over your face and neck and leave it for 10 minutes to work on your skin to remove the impurities and tan.
  • After that wet your hands, tap your face gently and scrub the skin with circular motion for 5 minutes.
  • Wash off completely with clean and cold water. That's it. This natural cleansing recipe beats even costly branded face washes leaving your skin clean, clear, soft and dirt free. If this is used daily, you can see the difference in your skin within a week. It removes the suntan and improves skin complexion removing the scars and dark spots.
A simple tip, if you have dry skin add a bit of honey to it as it has hydrating properties which nourishes dry skin.
Cleansing should be done twice a day with soap or face wash and more than 5 to 6 times a day with clean fresh water to achieve good complexion fast. Splash fresh water over your face whenever you get time everyday to achieve a lovely bright complexion! :)

Thursday, December 1, 2011

Winter Skincare Recipes for Dry Flaky Skin

Our skin needs to be well moisturized and nourished to get rid of dryness in winter. Dry skin is the main cause of dull and stretchy feel. If our skin is not properly nourished, it loses excess moisture and even shows out wrinkles for many people. My aunt worried that she is getting wrinkles and fine lines over her face during winters. I recommended to use a good moisturizing soap as well as a body lotion everyday. Many branded products such as Nivea, Himalaya and Vaseline has good body lotions which keeps skin moisturized but still we can also prevent skin dryness and tightness in winter with few natural beauty solutions at home easily. The very first few skin friendly nourishing things that I get into my mind when I think of winter are
  • Milk
  • Honey
  • Aloevera Gel
  • Banana
  • Olive oil
  • Almonds
  • Curd
  • Glycerin
All of the above mentioned natural items are very effective in nourishing and moisturizing dry skin. If they are used properly in a correct preposition your skin can even beat the other cosmetics because all these things are all natural, free from chemicals, preservatives and side effect free. The other main goodness is they are easily available all time in your own kitchen :)


SKINCARE RECIPES FROM THESE NATURAL ITEMS

Milk and Honey Skin Tonic
I recommend everyone to use Milk and Honey as facial skin tonic to prevent dryness and improve your complexion. Do this every morning after cleansing your face to nourish your facial skin well and prevent dryness, removes tan, wrinkles and blemishes. It softens skin and gives a natural glow. As honey has natural bleaching properties, it also acts as a natural skin lightener.

Banana and Honey Mask for Glowing skin
Banana and honey mask can be used to prevent dryness as well as wrinkles and dark spots. Banana, when mashed and applied along with milk or honey effectively removes suntan and nourishes dry and lifeless skin to bring out a soft natural radiant glow, which makes you stay young forever.

Olive oil and Glycerin Skin Tonic for Extremely Dry Skin
To say about Olive oil and glycerin, they moisturizes even extremely dry skin in winter and keep them moisturized for long hours. They should be mixed in equal preposition and applied over your dry facial skin and left for 20 to 30 minutes. After leaving this natural skin tonic on your skin gently massage your face in circular motion with your finger tips. Wash off with clean and cold water. This can be done daily, even with some other essential oil to be a skin beauty even in winter :)

Almond and Yogurt Face Pack
(Whitens and nourishes skin)
Paste of almonds and curd (Yogurt) acts as a natural facial mask which not only moisturizes your skin, it also softens, removes tan and blemishes, prevents the signs of aging and improves complexion with regular use. If your skin is extremely dry add some olive oil to this pack.

Aloevera Gel Skin Serum
Extract gel from aloevera leaf and mix it with lime juice and honey. Use this as a thin face pack which effectively removes acne scars, spots, tan and also improves skin complexion without making your skin dry in winter.

So, try all these naturally available skincare items to enhance and protect your beauty this winter. Leave your beauty quires through comments and I promise I would reply as soon as possible.Take care of your skin my lovable readers :)

Tuesday, November 29, 2011

Home Remedies for Strong and Shiny Nails

Like our skin, our nails also need extra nourishment in winter to get rid of chipping and breaking. Our nails break in winter due to extra moisture loss. To prevent this we at least need to moisturize them twice a day. How long your nails may be, they aren't really beautiful if they're dry and chipped. Note down the following natural and simple beauty tips for your nails and protect their beauty in this winter!

PETROLEUM JELLY (VASELINE)
Vaseline not only moisturizes your skin and lips, it can also be used to protect your nails from excess moisture loss in winter. Just take a bit of Vaseline, apply it over your nails and massage them for a minute to see an instant healthy shine :) This make take just a minute but the results are great and makes you a nail beauty! Do this twice a day, once after bath and the other before going to bed at night. This procedure gradually strengthens your nails and make them look fuller with a beautiful shine.

MILK
Milk is a natural ingredient which can act as a good cleanser and also a good nourishing tonic. Prepare a nail soak with milk to cleanse dirt from your nails and strengthen them. Take a small bowl and fill it with milk, soak your nails for 10 to 15 minutes and wash off with clean and cold water. A main thing I want to remind you all is that moisturize your nails with Vaseline or any baby oil soon after you work in water. It will prevent nails from weakening and cracking.
I have a little suggestion for you all! :) I always use Himalaya Lip Balm as a nourishing nail balm too. I also apply it over my nails and massage it. It gives an instant shine and also helps my nail grow long and beautiful without any cracks. Do this after every bath and every night before going to bed for best results.

Monday, November 14, 2011

Homemade Mehndi Cone - Long Lasting and Dark Color Tips

All aged people, especially women love Mehndi (Henna) :) Mehndi is a temporary hand decoration which is loved by most of the women in the regions like India and Pakistan. Mehndi, I mean henna is also used in hair care purposes such as hair coloring and conditionally naturally. Mehndi is very famous among Indian brides, as they wear mehndi designs in their hands, feet, arms and different parts of the body :) I love mehndi a lot from my childhood, but I never knew how to make beautiful designs until the age of 12. After that I got practiced well a and now designs better than before :P (Not so professional, but better enough). Everyone in my family asks me to design their hands with mehndi and I wondered every time how to get a nice dark color and make the staying power long lasting. I have been always using ready made packed mehndi cones from the store which has artificial coloring agents but this time I wanted to try something different for a long lasting natural mehndi designs and good color. Yeah, I made my own mehndi cone :) It's very simple, natural and free from chemicals and side effects, which you can easily prepare at home :) Follow the instructions below to make your own henna cone. Before that, see my own design and the natural color which I got :D

MY MEHNDI DESIGN (FOOT) :D :D


HOW TO MAKE MEHNDI CONE AT HOME
  • Buy and bunch of mehndi leaves and paste them finely adding enough water, few drops of eucalyptus oil and 2 teaspoons of lime juice. Keep in mind, the paste should not be too thin or too thick, it should be in a right consistency for easy smooth application and better results.
  • Take a clean, plain polythene or plastic cover (Thin) and role it to get a nice cone shape. Fill this mehandi paste into the hollow cone and tape the cone on it's sides and bottom with lots of cello tape that the paste shouldn't get out even a bit.
  • Allow the mehndi paste and the other ingredients to set well for 1 hour, I mean leave the cone as it is at least for 1 hour before starting the application.
After an hour, cleanse your hands or feet well and cut the tip of your mehndi cone slighting with sharp scissors. Now start designing your hands with all natural homemade mehndi cone :)

LONG LASTING COLOR AND DARKNESS TIPS
  • We have already added lemon juice and eucalyptus oil which acts as the color darkening agent in mehndi, so no need to add any extra applications after designing.
  • If you wish to get more dark colour and a long lasting mehndi design, mix sugar with little water to make a thin sugar syrup. Dip a cotton ball in this sugar syrup and apply over the little dried mehandi and leave for 6 to 8 hours. It's much better to design mehndi at night before going to bed, and remove in the morning :)
  • Remove the mehndi from your hands after that and apply two drops of eucalyptus oil for a good lasting power and shine :)


Friday, October 21, 2011

Skin Softening Body Lotion at Home

Hello friends! :) :) Past two days I am posting beauty tips which are useful for the winter season and today I am going to post a Homemade skin softening body lotion recipe which is suitable to use in all the seasons, especially in winter to prevent dryness in your skin. Just before an hour I made this body lotion in my home and it's really awesome, smells pleasant too. Let me explain you all with step by step instructions and pictures! :)

HOMEMADE SKIN SOFTENING WINTER BODY LOTION
I prepared this lotion just before an hour :)


INGREDIENTS
  • Vaseline or any other petroleum jelly
  • Vitamin E capsules
  • Glycerin
  • Small bowl
  • Old body lotion or face wash bottle

METHOD

1.Take a clean small bowl and add Vaseline to it as shown in the image below.


2. Now take the Vitamin E capsules (I used 4 capsules for a 7g Vaseline pack) and make holes in it using a pin, extract the oil from the capsules. Pour this extracted oil into the Vaseline bowl.


3. Now add required glycerin to the Vaseline and Vitamin E oil mixture. Blend well with a clean spoon. You can also add few drops of essential oils like sandal wood oil, lavender oil, rose essence or any other one for a pleasant flavor. Now heat this bowl until the mixture melts (It takes only 5 to 10 secs to melt) as shown in the below picture


4. Once the mixture gets melted, turn off the stove and pour this mixture immediately to an old lotion bottle or a face wash bottle. I used clean and clean face wash bottle to store this body lotion. Allow the mixture to set and get thicker for 10 minutes. You can refrigerate this lotion for fast setting and a cooling effect on your skin. This lotion is transparent, non greasy and easily gets absorbed to the skin. With daily usage, it fades out the body scars and dark spots as it contains Vitamin E, a natural scar remover.


USAGE AND RESULTS
  • It is a chemical free, very natural homemade skin softening lotion which also fades scars and evens out complexion.
  • You should use this lotion over your skin after every bath and before going to bed every night to nourish your skin and give softness. You can see visible results within a week.
  • It prevents dryness and softens the skin instantly.
  • I recommend all aged people to prepare this lotion at home and use it in winter and also in summer if you have dry skin. Even children can use this to achieve a softy softy skin.

I hope you all like this homemade skin softening body lotion recipe. Good luck :) Leave your comments below :)

Save your beautiful skin from this winter!

Thursday, October 20, 2011

Fair Skin in 30 Days - Homemade Herbal Face Pack

Hey guys! How are you all today? Hope you're doing fine. Today I am going to write about a MAGICAL HOMEMADE FACE PACK which can lighten your skin and make it blemish free, but before that I want to discuss with you all an important thing. What do you all mean by fairness and why most of you people want white and paler skin? Do you consider it as a beauty? Not at all. Only we Indians believe the myth that whiter skin is beautiful while the white people badly wants to get dusky complexion like us. We can never change our born skin color naturally. Even if we use chemicals and bleaches, it does only peels of the healthy skin and gives you a pale skin which looks artificial and that too fades off within few days back to your born color. But this time, your skin would become damaged and be looking really horrible due to these chemical products. Do you all want these? Everything you can do naturally for your skin complexion is just removing the suntan and retaining you original born skin color. There are many home remedies and natural herbal remedies we can simply follow in our home to retain our natural skin color and get rid of blemishes and uneven skin tone which reveals your baby soft beautiful skin within fewer uses!

In this post I am gonna write about an interesting HERBAL FACE PACK which can retain your original born skin color and makesyour skin blemish free within few weeks of usage.

Herbal Face Pack for Fairness in 30 Days


Ingredients:
1.Holy basil powder (Tulsi) - 2 teaspoons
2.Neem powder - 2 teaspoons
3.Multani mitti - 1 teaspoon
4.Lemon juice - Few drops
5.Rose water - Few drops


Method:
  • Mix all the ingredients to form a smooth paste.
  • Cleanse your face with your soap or face wash.
  • Take facial steam for 3 minutes. Taking a facial steam before using face packs, gives double effects as the steam opens up the skin's pores and allows the ingredients to penetrate and work well on your skin. [Make sure not to steam your facial skin more than once every ten days, this facial steam need not to be done everyday. Just once in ten days is enough]
  • Now gently wipe your skin and apply the smooth paste over your face and neck evenly with fingers or with the use of the face pack brush.
  • Allow the pack to work on your skin for 20 minutes.
  • Now wet your fingers and gently scrub your face in circular motion for at least ten minutes to remove all the dead skin cells and impurities to bring out your new fair skin. Wash off with clean and cold water. Pat dry.

Usage:
Use this pack daily for faster results! This is fully natural and hence no need to worry about any side effects. You can also use this on children skin. I strongly recommend everyone to use this herbal face pack, a natural skin product at home DAILY FOR 30 DAYS. After that you can use it twice or once in a week to maintain the fair complexion permanently.


Results:
Eager to know? I am not going to say anything this time my friends. I recommend everyone to try this magical face pack yourself and submit your results here! It really does wonders! Rejuvenates skin, removes tan, evens out skin tone, improves complexion, vanishes blemishes, acne scars blackheads and dark spots. It's a all in one natural face pack which everyone should try! Kindly share this with your friends too!

Beauty Benefits of Vaseline

Hey everyone! Hope you all liked my previous posts! :) In this post I am going to write about the "Beauty Benefits of Vaseline". I guess you all know what Vaseline is, but still I will tell once for the people who doesn't know. VASELINE is nothing but a Petroleum Jelly. There are many household benefits of Vaseline but today I am gonna simply list out simple tips using Vaseline to enhance your beauty in all the seasons, especially in winter ha ha..:) Winter is the worst season for dry skinned people as the humidity in the air dries out the skin :( But a small box of Vaseline can save your beauty throughout the winter! Let's move on to the tips! Enjoy :) Don't forget to leave your comments after reading


DRY LIPS
The very first problem we all face in winter is chapped lips :( :( we gets our lips dry all the time in winter, it may even bleed for few people. We need to continuously moisturize our lips to prevent them from drying and chapping. A few natural products and Vaseline can help this! You can simply carry the Vaseline petroleum jelly in your handbag and apply it on your lips whenever you feel dry. You can also mix Vitamin E oil with Vaseline, boil this mixture and cool it down to use this as a nourishing homemade lip balm.

WEAK NAILS
Weakness and dryness causes breakage of nails. This spoils the nail growth. You can simply take some amount of Vaseline and massage your finger and leg nails with this to prevent nails from chapping. This massage also improves blood circulation and promotes healthy strong nail growth. For better results do Vaseline nail massage every night before going to bed.

CRACKED FEET
Cracked feet looks really ugly and horrible. This is mainly caused because of improper maintenance of your feet, even in winter. Wash your feet and apply Vaseline every night to prevent cracking. To cure the cracks which you already have, do a home pedicure with loofah pad or scrubber and then moisturize your feet with Vaseline. It is recommend to nourish and moisturize feet with Vaseline after every pedicure.

DRY AND TIGHT SKIN
For people who have dry skin, Vaseline is really a good friend :) Apply Vaseline over your skin and massage well for 10 minutes. Then wash off with clean, cold water and towel dry. This process prevents your skin from drying for a long time.Mixture of Vaseline and rose water can be used as an instant moisturizing body lotion for dry skinned people!

Have a Vaseline winter ! :) :) Prevent your skin!


Sunday, October 16, 2011

Anti-aging Banana Facial Peel (Also Lightens Skin)

Banana has lots of skin nourishing and anti aging properties. They do also help our eyes to relax and recover from dark circles and sagging skin. I am going write in this post about a very effective BANANA FACIAL PEEL RECIPE AT HOME to make your skin young, wrinkle free and spot free. The peel also lightens the skin to give you an ever glowing complexion. To see faster results, use this banana facial peel once in a week Girls, guys, men and women in thirty's, forty's and even grannies can use this for glowing young skin! All the best! Leave your comments after trying this facial peel. I would love to hear from you!

FRESH BANANAS


HOMEMADE ANTI-AGING BANANA FACIAL PEEL
(Also lightens skin and removes wrinkles)

INGREDIENTS
1.Ripen Banana
2.Honey
3.Lemon juice
4.Gelatin

Here's how..
  • Mix gelatin in half a cup of water and boil the mixture in a double boiler until it melts. Turn off the stove.
  • Peel off the skin of a banana and cut into small pieces. Mash it well.
  • Add this banana paste, honey and lemon juice to the gelatin and blend well to form a smooth paste. Refrigerate this mixture for 20 minutes.
  • Our anti aging banana facial peel recipe is ready now!

HOW TO APPLY
  • Cleanse your face with a regular soap or face wash. Pat dry.
  • Apply this anti aging facial peel mixture over your face and neck, spread it to cover the entire facial skin surface evenly.
  • You can cut the banana peels (Better if refrigerated) into two small pieces and keep it over your eyes, which acts as a natural eye coolant and relaxant, it also cures dark circles.
  • Allow the peel to dry for 15 to 20 minutes.
  • Now gently peel off from neck to face, in an upward motion. Wash your face with clean and cold water!
  • The peeling process is complete :)

RESULTS
Follow this anti aging facial peel every week to see magical young glow in your skin! The peel removes the outer dead skin layer to allow the new soft skin layer to grow. The lemon juice and honey has natural whitening properties which gives you a lighter skin soon. Banana cures the wrinkles, tightens and nourishes the skin to reduce 10 years from your skin's age! Try this multipurpose peel for sure!

I have already posted few effective homemade natural facial peels and packs. If you missed to read them, Click the links to check it out now..


Good luck! I will be back tomorrow with a good product review and some effective beauty tips.
Keep visiting !


Home Treatment to Beautify Dark Neck

Hello everyone! Hope you're doing fine. In this post, I am going to write about how to cure and prevent our neck from darkening and wrinkling. The first mistake most of the people do is, they never take care of their neck :( They never wash neck while washing face, they never moisturize, they never use face packs there. Our neck is a part which is open to the sunlight as the face. When we fail to give the same importance to neck as we give to our face, we get terrible looking neck which spoils the whole beauty. Even we have soft and bright looking face, if our neck is dark everyone stares at it. Neck is an important part of the body which beautifies a women. Most of the women don't wear collared shirts or close necked tops like men and hence the skin in their neck get damaged by UV rays and gives really a bad look! Don't worry. You can clear out this suntan over ur neck and prevent it from coming back with natural home treatments. Follow the two tips given below. Good luck friends.


ALMOND OIL MASSAGE
  • Cleanse your neck (Both front and back) with warm water and soap.
  • Heat the almond oil and mix few drops of Vitamin E oil to it, which is extracted from the capsules.
  • Now apply this oil allover your neck and massage well with your finger tips for 10 to 15 minutes.
  • After massaging wipe off the oil with clean cloth and wash your neck with cold water.
  • This process nourishes, stimulates the skin and removes the dead skin cells to give an even complexion.

EXFOLIATING SCRUB WITH LOOFAH
  • Mix Baking soda with water to form a smooth paste. Apply this allover your neck evenly.
  • After it dries, wet the loofah and scrub the neck gently. This process removes the dead skin layer and tan to give a glowing tan free neck. Never ever forget to moisturize your neck after you wash it.

NOTE: Wash neck twice a day with clean water to prevent sweat. The sweat forms a dark ugly layer when it is not cleaned. Moisturization is must after cleansing to avoid roughness, darkness and wrinkles.